Domains & Verification
Allowed domains are the websites where your referral widget can run. You add each site under Admin → Domains and verify that you own it.
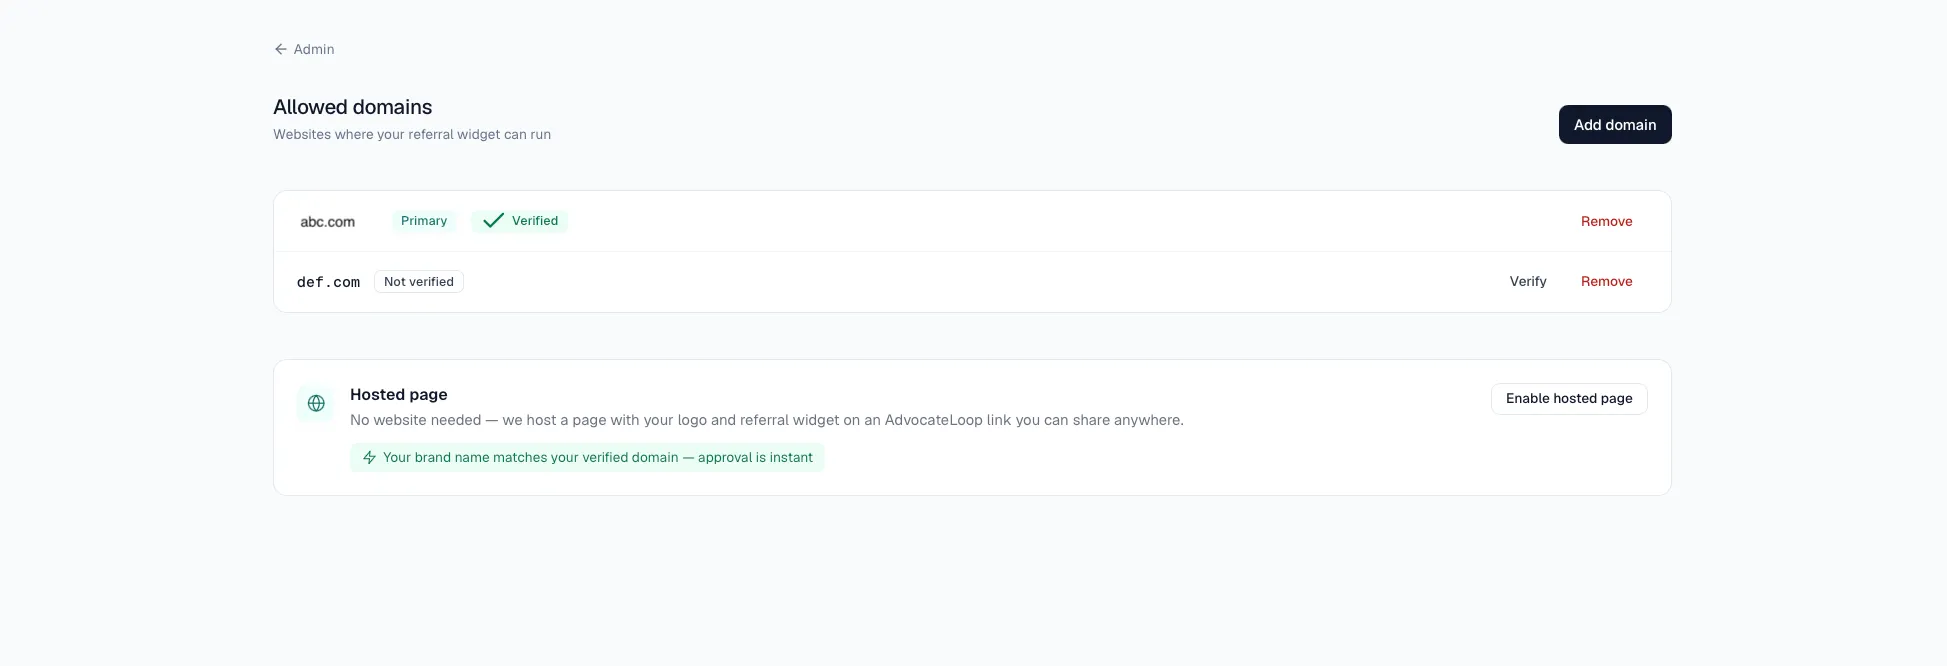
You’ll need owner, admin, or manager access to manage domains.
Add a domain
- Go to Admin → Domains and click Add domain.
- Enter your domain without
https://or any path — for exampleexample.com. - Optionally tick Set as primary domain.
- Click Add domain.
The domain is added in an unverified state — verify it next so your widget can run there.
Verify a domain
Click Verify next to a domain, then choose a method. Both prove you control the domain; pick whichever is easier for your setup.
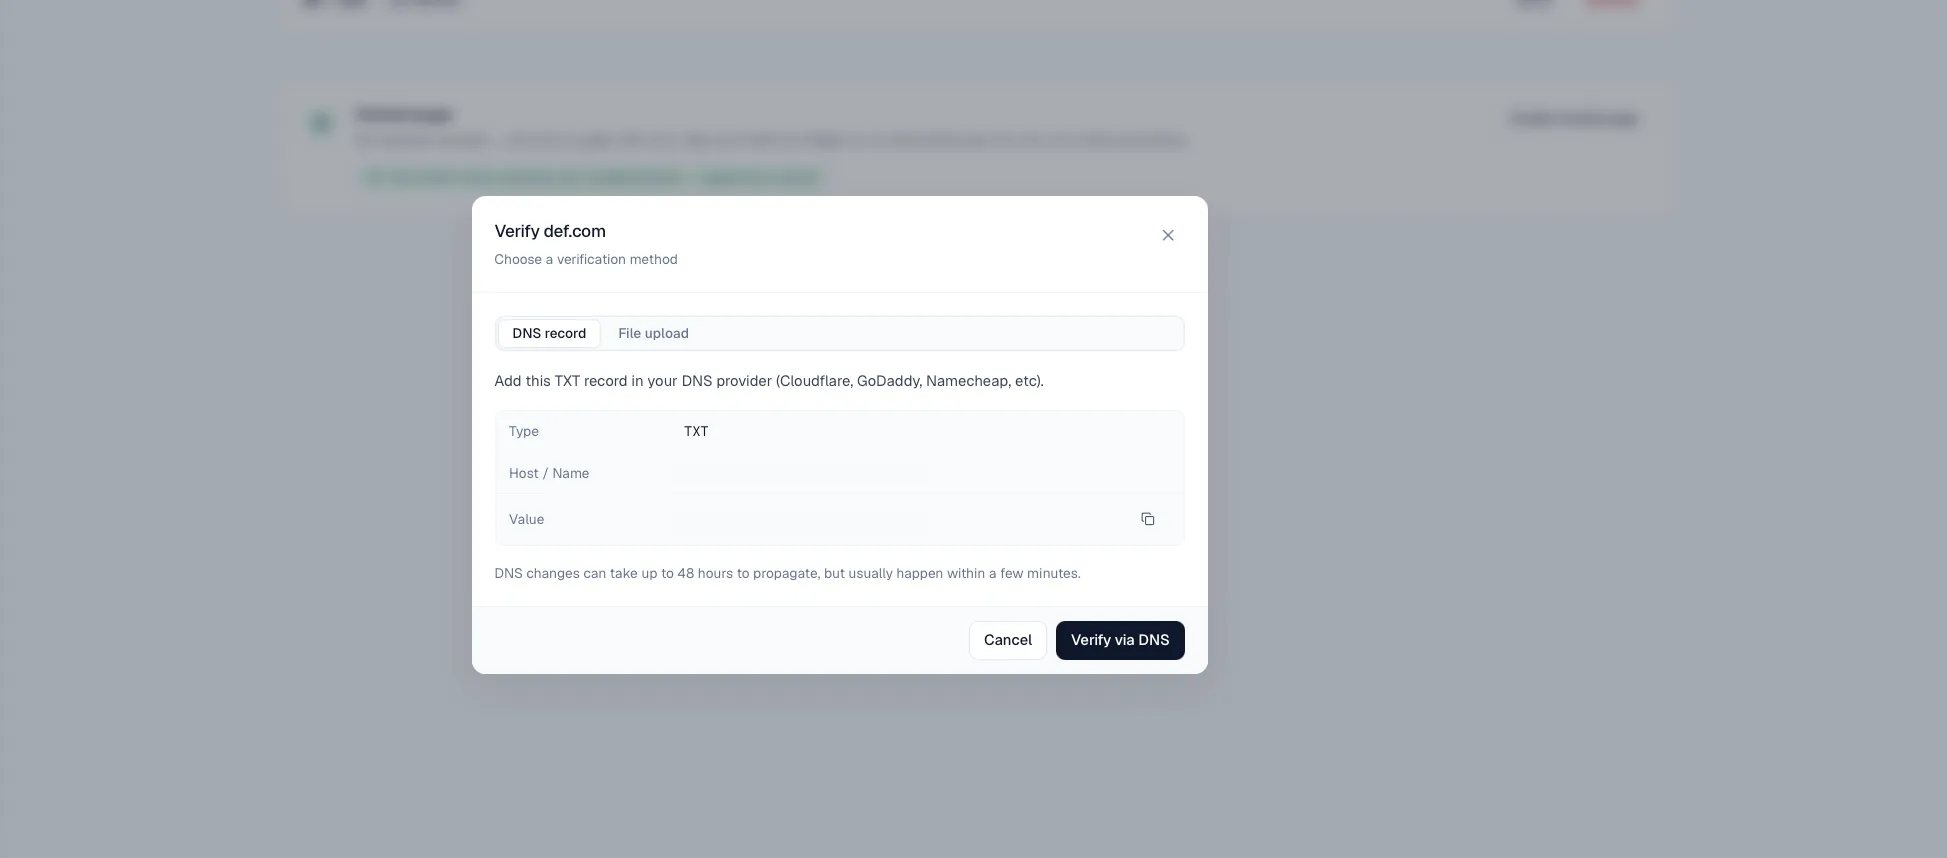
Option A — DNS record (TXT)
Best when you can edit your DNS. Add this record at your DNS provider (Cloudflare, GoDaddy, Namecheap, and so on):
| Field | Value |
|---|---|
| Type | TXT |
| Host / Name | shown in the modal |
| Value | the token shown in the modal |
DNS changes can take up to 48 hours to propagate, though they’re usually live within a few minutes. Then click Verify via DNS.
Option B — File upload
Best for provider-hosted subdomains (Vercel, Netlify, Railway) where you can’t edit DNS. Upload a plain text file so it’s reachable at the URL shown in the modal:
- File path / URL — shown in the modal
- File contents — the exact token shown in the modal
The file must return HTTP 200 with the token as its body. On Next.js, place it at public/.well-known/advocateloop-verify.txt. Then click Verify via file upload.
Once the check passes, the domain is marked verified.
Why verification matters
- Your widget only runs on verified domains — see the note at the top of this page.
- Instant hosted page approval — verifying a domain that matches your brand name approves your hosted brand page instantly, with no manual review.
Remove a domain
Removing a domain stops your referral widget from working there. Click Remove next to the domain and confirm.